Build Your First AR-15: An Everyday Gun Owner's Guide to Custom Crafting a Rifle
May 06, 2024
Categories:
Special Guest Post
This Blog is for entertainment purposes only. The thoughts and objectives of this Blog are the writer's own and in no way reflective of Anderson Manufacturing's build processes or procedures. Always consult a licensed gunsmith when modifying any firearm. Enjoy.

Build Your First AR-15: An Everyday Gun Owner's Guide to Custom Crafting a Rifle
Special Guest Blogger: Jason Schaller
Imagine crafting your very own AR-15, customized down to the last detail to perfectly suit your needs. Whether it’s for hunting, home defense or simply target practice, you can have a custom rifle built to your needs. Embarking on the journey to assemble your first AR-15 can seem like navigating uncharted waters, but it’s more about the adventure than the apprehension as you are building your legacy one part at a time. I have helped many people build their first AR and when you look at the rifle as a sum of parts, it is less daunting of a task.
In this post, I am going to break the assembly down into its basic steps. This is not so much as “How to Build an AR” post but a framework of success, empowering you with the knowledge to build your rifle with confidence.
Essential Gear and Where to Begin
Before diving in, ensure you have collected the essential tools for DIY'ing your first AR Build. While there are some special tools you will need, tools like screwdrivers, punches, hammers can be purchased locally. You may even have them already.Before we begin, you will need to have the following rifle components:
- Stripped Lower Receiver: The foundation
- Lower Parts Kit: The guts
- Upper Receiver: The brain
- Barrel: The heart
- Handguard: The backbone
- Bolt Carrier Group: The muscle
- Stock and Buffer Assembly: The spine
- Sights and Optics: The eyes
- Front Pivot Pin Tool
- Hammer (bigger is not better, necessarily, a 4 oz. hammer is plenty of weight)
- Roll Pin Punch Set
- Punch Set
- Bench Block(or a roll of masking tape if you don't have a bench block)
- Upper Vise Block
- Vise
- Torque Wrench
- AR Armorer's Tool
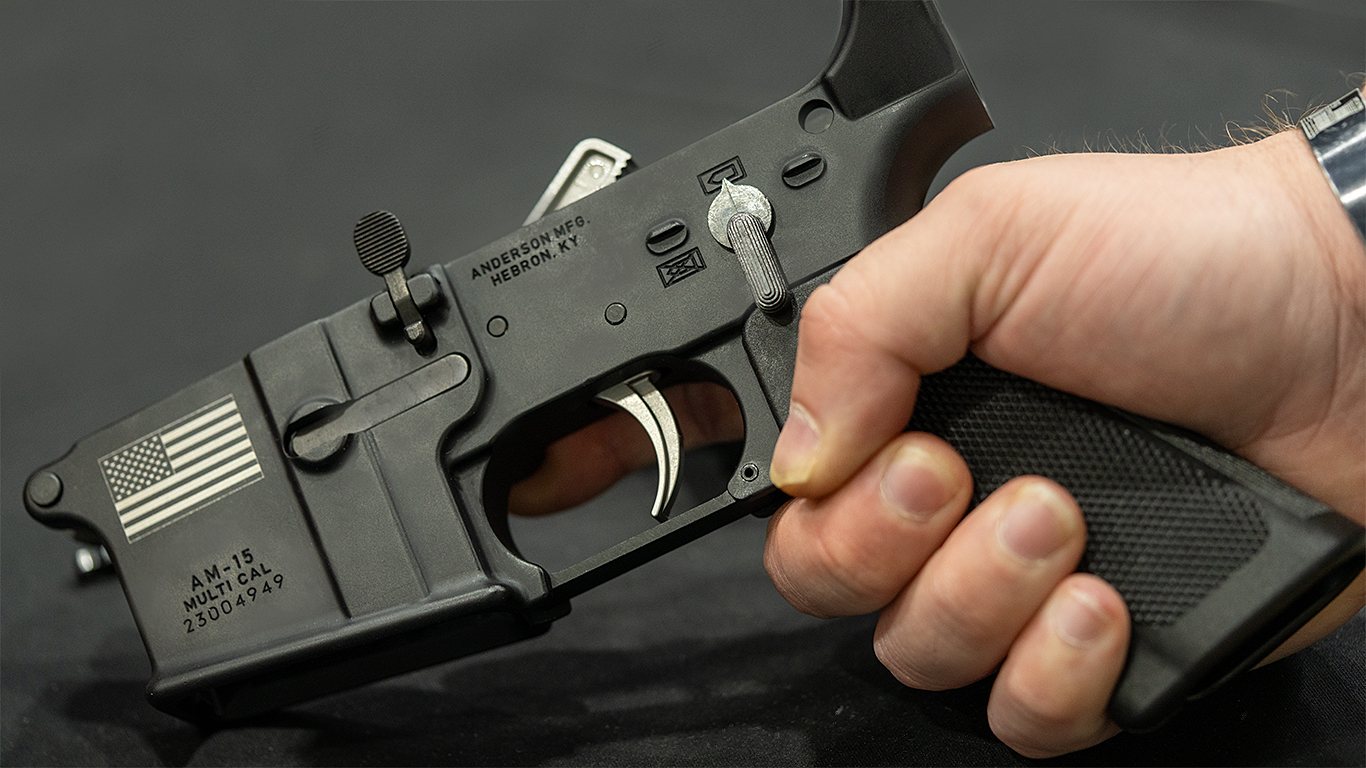
The Lower Receiver Assembly
Over the years I have changed my starting point on the assembly of lowers. There are some components that need to be installed before others, but I follow the “Tip to Tail” install order which goes like this:
A common problem that new AR builders come across is installing the roll pin for the bolt release. Roll pin punches have a hard time getting into the area and there are two options to combat this. The first is to get a special punch set that is cut out to install this pin and the second is to put electrical tape on the lower and the punch to keep marks off the lower receiver. It is common to see hammer strikes and punch scratches on the lower of first-time builders. Take care when installing this pin.
Each piece has a place and an install order. When it comes to the fire controls, the order is a little weird as it doesn’t truly follow the tip to tail. The trigger is in the middle, then I put in the safety lever which is behind the trigger and flops around until the grip gets installed, and then the hammer which is forward. Each piece that you put into your rifle is a small victory in the build process. Celebrate the small wins—they make up the big ones.
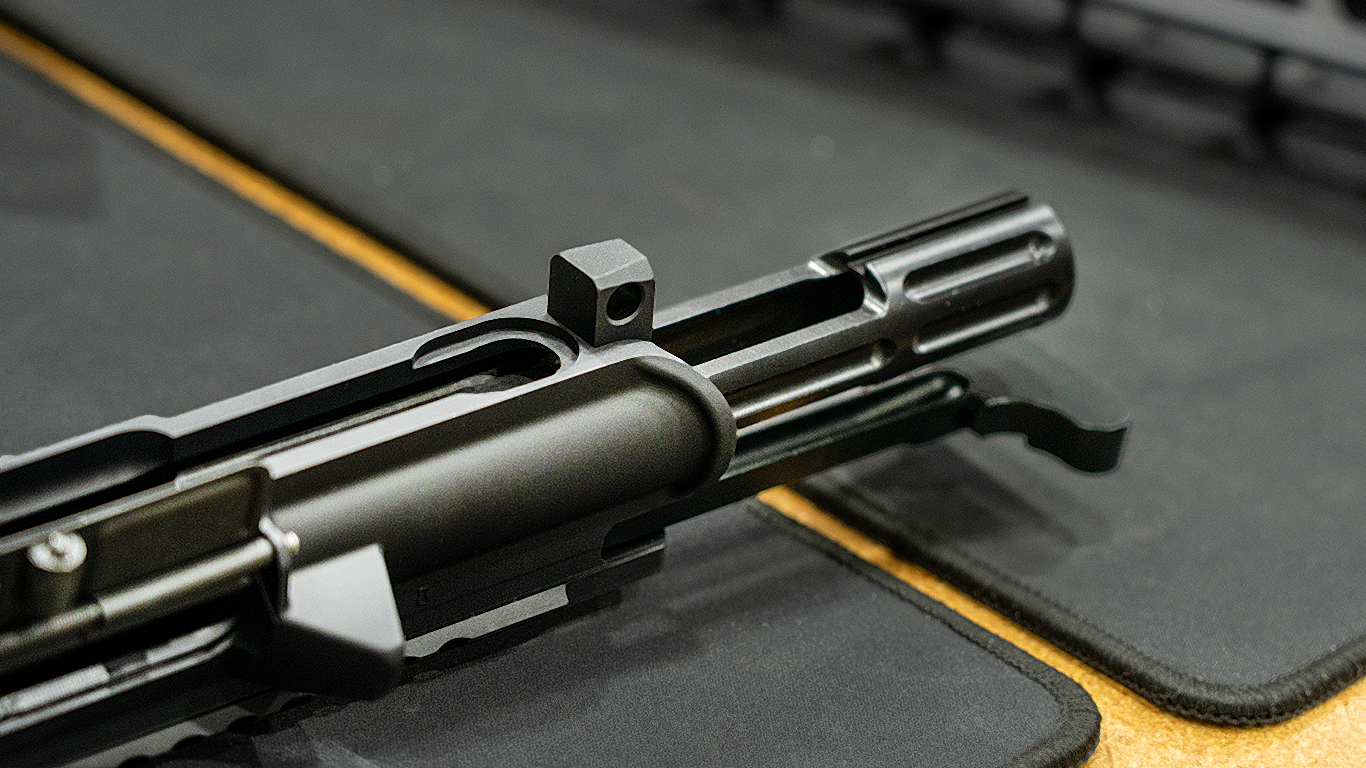
Tackling the Upper Receiver
If you are building your upper from scratch, I like to teach a tail to tip install pattern. Start by installing the forward assist and then the dust cover. Make sure you install the dust cover BEFORE you install the barrel as the barrel nut will keep the ejection port pin in place. Once the barrel nut is installed, you will not have the ability to install the ejection port without pulling the barrel off first.
Now we can mount the barrel. AR barrels are keyed with an alignment pin that matches up with a notch in the upper. Install your barrel nut to specifications and then tackle the gas block (or A2 Front Sight Post if you are not free floating the handguard) and gas tube. From there install the handguard and your muzzle device. Finally, we install your charge handle and bolt carrier group. Your build is taking shape, and you are rounding the final turn on your build.
Uniting the Halves
Other than test firing, this is one of my favorite parts of a build. Connecting the upper and lower receivers transforms your scattered parts into a singular, formidable AR. It's a pivotal moment, both metaphorically and physically.Open the front and rear takedown pins, place our upper onto the lower and close the pins. Your rifle build is now complete!
Safety Checks
With assembly complete, meticulous safety checks are paramount. Cycle dummy rounds to ensure smooth operation and to ensure that your safety works.
Ready, Test, Fire!
Your build is ready for its maiden voyage at the range. Each round fired is a testament to your craftsmanship. Take pride in each bang as this is YOUR work echoing down the range!
Embrace the Builder's Journey
This isn't just about putting parts together—it's about crafting an extension of your own capabilities. The journey might start with a bit of nervous energy, but it ends with a profound sense of achievement. The only better time to start your journey was yesterday! Start today and you will have the personal satisfaction and pride that comes to building and using a self-built custom firearm.
You’re already on Anderson’s website, pick your components now and share your journey on social media. Your build today just might inspire someone else’s build tomorrow. Also, don’t forget to tag Anderson Manufacturing on your DIY journey!
About Jason Schaller
Jason Schaller, renowned for his expert DIY gunsmith tutorials on his YouTube channel and website, The Rogue Banshee. He brings over four decades of shooting experience and more than ten years of gunsmithing experience as an FFL holder. As the Chief Instructor at Freedom Crew University, Jason dedicates himself to educating a broad audience on DIY Gunsmithing and uses social media to advocate for a well-informed public about all aspects of firearms and Second Amendment rights.